DIY Hair Crowns and Gathering Materials
The Allure of Hair Crowns
Hair crowns have been a symbol of beauty, elegance, and creativity for centuries. From ancient civilizations to modern-day fashion runways, these stunning headpieces have adorned the heads of royalty, brides, and festival-goers alike. In recent years, DIY hair crowns have gained popularity as a fun and affordable way to add a touch of glamour to any outfit or occasion. Whether for a wedding, a music festival, or simply to elevate everyday style, creating your own hair crown allows for endless customization and personal expression.
This guide will walk you through the process of making your own hair crown, from gathering materials to adding the final touches. By the end of this step-by-step tutorial, you’ll have a unique and stunning headpiece that reflects your personal style.
Why Make Your Own Hair Crown?
While store-bought hair crowns are readily available, crafting your own offers several advantages. First, it allows for complete creative control. You can choose the colors, materials, and design elements that resonate with your vision. Second, DIY hair crowns are often more cost-effective than purchasing pre-made ones. Finally, the process of creating something with your own hands can be incredibly rewarding and therapeutic.
Materials You’ll Need
Before diving into the creative process, it’s essential to gather all the necessary materials. The beauty of DIY hair crowns lies in their versatility, so feel free to adapt this list based on your preferences and the type of crown you want to create.
Basic Supplies
The foundation of any hair crown is a sturdy base. Floral wire, headbands, or even old tiaras can serve as the structure for your creation. Floral wire is particularly popular because it’s flexible, easy to shape, and can be wrapped with other materials for a polished look.
Decorative Elements
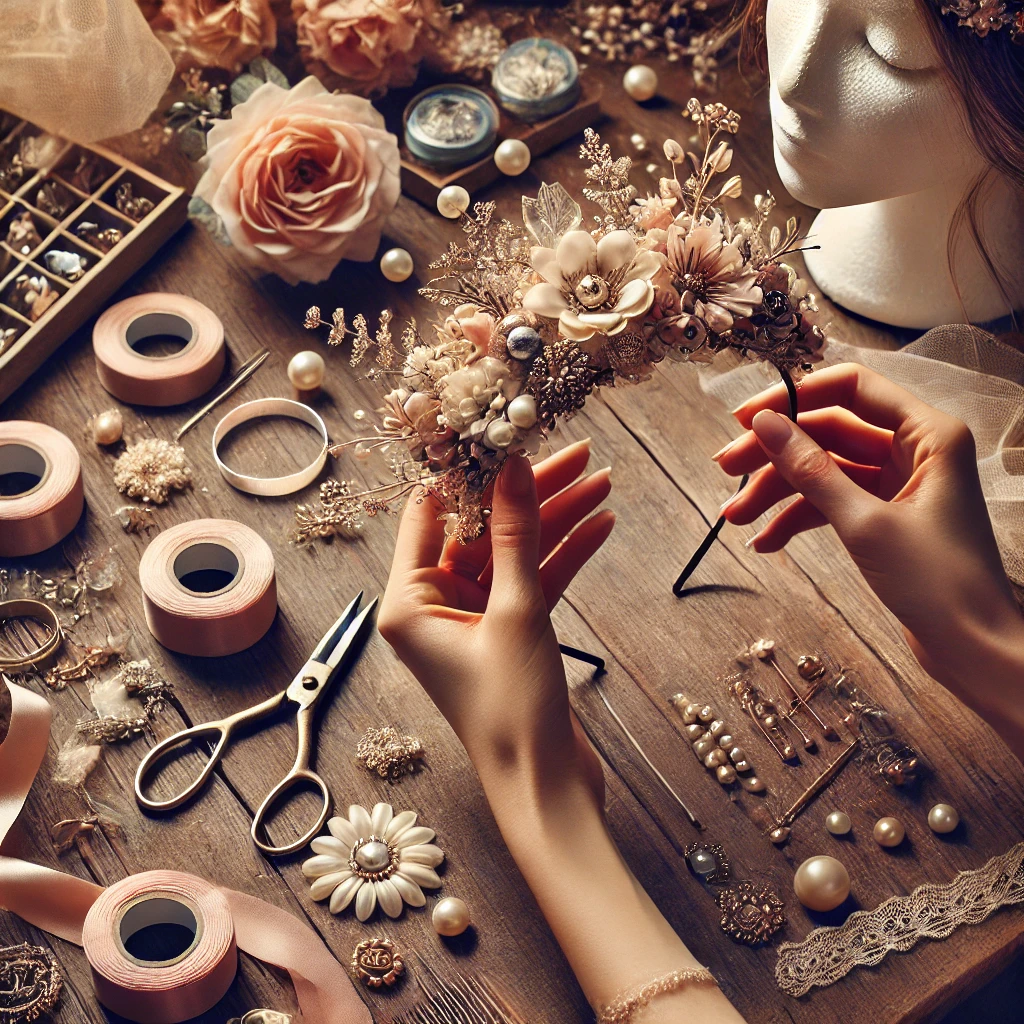
The decorative elements are what make your hair crown truly unique. Fresh or artificial flowers, ribbons, beads, feathers, and gemstones are all popular choices. If you’re going for a bohemian vibe, consider incorporating dried flowers or greenery. For a more glamorous look, opt for sparkly beads or rhinestones.
Tools for Assembly
To bring your vision to life, you’ll need a few basic tools. Wire cutters, pliers, a hot glue gun, and scissors are essential for shaping, attaching, and trimming materials. If you’re working with fresh flowers, a small water source or floral tape can help keep them fresh during the crafting process.
Optional Add-Ons
Depending on your design, you may want to include additional elements like lace, fabric, or even small trinkets. These can add texture and depth to your hair crown, making it stand out even more.
Planning Your Design
Before starting, take some time to sketch out your design or gather inspiration from photos online. Consider the occasion, your outfit, and your personal style. For example, a wedding hair crown might feature delicate white flowers and pearls, while a festival crown could incorporate bold colors and eclectic elements.
By gathering your materials and planning your design in advance, you’ll set yourself up for a smooth and enjoyable crafting experience. In the next section, we’ll dive into the process of creating the base of your hair crown.
Creating the Base of Your Hair Crown
Choosing the Right Base
The base of your hair crown is the foundation upon which all other elements are built. It’s crucial to choose a base that is both sturdy and comfortable to wear. There are several options to consider, each with its own advantages.
Floral Wire Base
Floral wire is a popular choice for DIY hair crowns because it’s lightweight, flexible, and easy to shape. To create a wire base, measure the circumference of your head and cut a piece of wire slightly longer than this measurement. Use pliers to twist the ends together, forming a circle. For added stability, you can wrap a second piece of wire around the first.
Headband Base
If you prefer a simpler approach, a plain headband can serve as the base for your hair crown. Choose a headband that matches the color of your hair or the materials you’ll be using. This option is particularly convenient for those who want a quick and easy project.
Comb or Clip Base
For a more secure fit, consider using a comb or clip as the base. This option works well for smaller, more delicate crowns that don’t require full head coverage. Simply attach your decorative elements to the comb or clip using hot glue or wire.
Shaping and Securing the Base
Once you’ve chosen your base, it’s time to shape and secure it. If you’re using floral wire, you may want to wrap it with ribbon, fabric, or floral tape to create a more polished look and prevent it from slipping in your hair. For headbands, you can wrap them with similar materials or leave them as-is for a minimalist aesthetic.
Adding Stability
To ensure your hair crown stays in place, consider adding small loops or hooks to the base. These can be used to attach bobby pins or hair ties, providing extra security. If you’re using a wire base, you can also bend the wire slightly to fit the shape of your head more comfortably.
Preparing for Decoration
Before moving on to the decorative elements, take a moment to assess your base. Make sure it’s the right size and shape for your head, and that it feels secure and comfortable. If necessary, make any adjustments at this stage.
By creating a strong and well-fitted base, you’ll ensure that your hair crown not only looks beautiful but also stays in place throughout the day or night. In the next section, we’ll explore how to add the decorative elements that will bring your hair crown to life.
Adding Decorative Elements
Selecting Your Decorations
The decorative elements are what make your hair crown truly unique. Whether you’re going for a natural, bohemian look or a glamorous, sparkling design, the possibilities are endless. Here are some popular options to consider:
Flowers
Fresh or artificial flowers are a classic choice for hair crowns. If you’re using fresh flowers, choose blooms that are sturdy and long-lasting, such as roses, baby’s breath, or daisies. Artificial flowers offer more durability and come in a wide range of colors and styles.
Ribbons and Fabric
Ribbons and fabric can add softness and movement to your hair crown. Consider using satin, chiffon, or lace for a romantic touch. You can tie ribbons into bows, create flowing trails, or wrap them around the base for added texture.
Beads and Gemstones
For a touch of sparkle, incorporate beads, rhinestones, or gemstones into your design. These can be glued directly onto the base or strung together to create dangling elements.
Feathers and Greenery
Feathers and greenery can add a whimsical, nature-inspired vibe to your hair crown. Consider using small feathers, ferns, or eucalyptus leaves for a bohemian look.
Attaching the Decorations
Once you’ve selected your decorations, it’s time to attach them to the base. The method you choose will depend on the materials you’re working with.
Using Hot Glue
Hot glue is a quick and effective way to attach most decorative elements. Apply a small amount of glue to the back of each flower, bead, or feather, and press it firmly onto the base. Be careful not to use too much glue, as it can create a messy appearance.
Wiring Elements Together
For a more secure attachment, consider wiring elements together. This is particularly useful for fresh flowers or heavier decorations. Use floral wire to wrap around the stems of flowers or the bases of beads, then attach the wire to the base of the crown.
Layering and Balancing
As you add decorations, think about balance and proportion. Start with larger elements, such as flowers or feathers, and fill in the gaps with smaller details like beads or greenery. Layering different textures and colors can create a more dynamic and visually interesting design.
Adding Final Touches
Once all the decorations are in place, take a step back and assess your hair crown. Are there any gaps or areas that need more detail? Are the elements securely attached? Make any necessary adjustments, and consider adding a final layer of ribbon or fabric to cover any exposed wire or glue.
By carefully selecting and attaching your decorative elements, you’ll create a hair crown that is both beautiful and durable. In the final section, we’ll discuss how to style and care for your DIY hair crown.
Styling and Caring for Your DIY Hair Crown
Styling Your Hair Crown
Once your hair crown is complete, it’s time to style it with your hair. The way you wear your hair can significantly impact the overall look of your crown. Here are some popular styling options:
Loose Waves
Loose, flowing waves create a soft and romantic look that pairs beautifully with floral crowns. Use a curling iron to create gentle waves, and let your hair fall naturally around the crown.
Braids and Twists
Braids and twists can add a bohemian touch to your hair crown. Consider creating a loose braid or twist along the side of your head, and secure the crown around it. This style works particularly well for festival or outdoor events.
Updos
For a more formal look, consider pairing your hair crown with an updo. A messy bun, chignon, or braided updo can create an elegant and sophisticated appearance.
Securing Your Hair Crown
To ensure your hair crown stays in place throughout the day or night, use bobby pins or hair ties to secure it. If you’re using a wire base, you can bend the wire slightly to fit the shape of your head more comfortably. For added security, consider using a few discreet bobby pins to anchor the crown to your hair.
Caring for Your Hair Crown
Proper care can extend the life of your DIY hair crown, especially if you’ve used fresh flowers or delicate materials.
Storing Your Crown
Store your hair crown in a cool, dry place to prevent damage. If you’ve used fresh flowers, consider misting them lightly with water and storing the crown in the refrigerator to keep them fresh.
Cleaning and Maintenance
If your hair crown becomes dusty or dirty, gently clean it with a soft brush or cloth. Avoid using water or harsh chemicals, as these can damage the materials.
Repurposing Elements
If you no longer want to wear your hair crown, consider repurposing the decorative elements. Flowers can be dried and used in other crafts, while beads and ribbons can be incorporated into new projects.
Embrace Your Creativity
Creating your own DIY hair crown is a rewarding and enjoyable process that allows you to express your creativity and personal style. By following this step-by-step guide, you’ll have a stunning headpiece that’s perfect for any occasion. Whether you’re attending a wedding, a festival, or simply want to add a touch of glamour to your everyday look, a handmade hair crown is a beautiful and unique accessory.
So gather your materials, let your imagination run wild, and enjoy the process of bringing your vision to life. With a little time and effort, you’ll have a hair crown that’s as unique and special as you are.


