DIY Hair Ribbons
Hair ribbons have been a timeless accessory, adding a touch of elegance, playfulness, or sophistication to any hairstyle. From vintage-inspired looks to modern fashion statements, hair ribbons have remained a versatile and beloved adornment. However, store-bought hair ribbons can often be expensive or lack the unique touch that reflects personal style. This is where the beauty of DIY hair ribbons comes into play. Creating your own hair ribbons not only allows for customization but also offers a fun and creative outlet for self-expression.
In this comprehensive guide, readers will learn how to craft their own hair ribbons from scratch. The process is broken down into four detailed parts, each focusing on a specific aspect of the creation process. From selecting materials to adding personalized embellishments, this guide will walk you through every step. Whether you are a seasoned crafter or a beginner looking to explore a new hobby, this guide is designed to be accessible and engaging.
The first part of the guide will cover the essential materials and tools needed to get started. Understanding the basics is crucial for ensuring a smooth and enjoyable crafting experience. The subsequent parts will delve into the actual creation process, including cutting, sewing, and decorating the ribbons. Finally, the guide will conclude with tips on styling and maintaining your handmade hair accessories.
By the end of this guide, readers will have the knowledge and confidence to create their own unique hair ribbons. Not only will these accessories be a reflection of personal style, but they will also serve as a testament to the joy of handmade creations. So, gather your materials and let’s dive into the world of DIY hair ribbons!
Gathering Materials and Tools
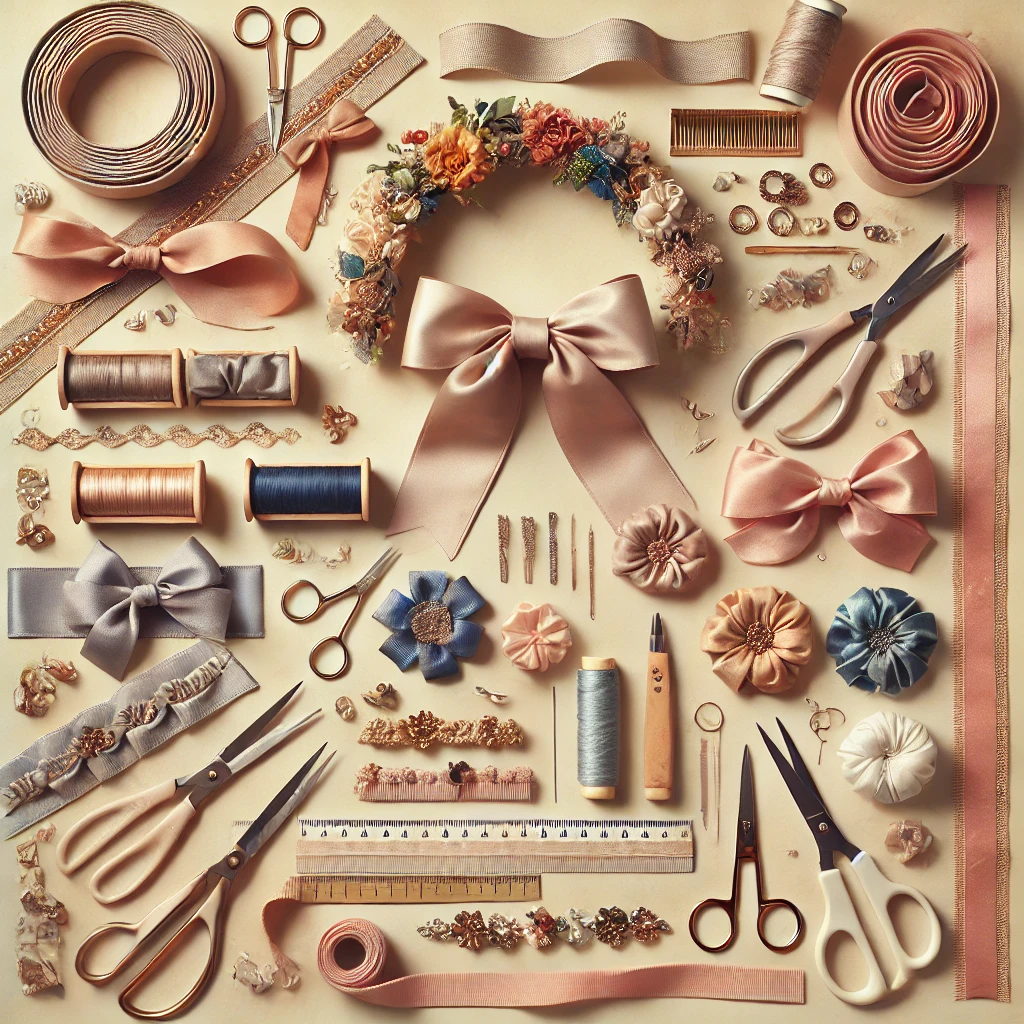
Before embarking on the journey of creating DIY hair ribbons, it is essential to gather all the necessary materials and tools. Having the right supplies on hand will not only make the process smoother but also ensure that the final product is of high quality. This section will provide a detailed overview of the items needed, as well as tips for selecting the best materials for your project.
Choosing the Right Fabric
The foundation of any hair ribbon is the fabric. The type of fabric chosen will determine the overall look, feel, and durability of the ribbon. For beginners, it is recommended to start with fabrics that are easy to work with, such as cotton or satin. Cotton is a versatile and affordable option, while satin offers a luxurious sheen that is perfect for more formal occasions.
When selecting fabric, consider the color and pattern. Solid colors are a classic choice and can be easily paired with various outfits. Patterns, on the other hand, can add a playful or unique touch to the ribbon. It is important to choose a fabric that complements personal style and the intended use of the ribbon.
Essential Tools for Crafting
In addition to fabric, several tools are required to create hair ribbons. These include scissors, a measuring tape, pins, a sewing machine or needle and thread, and an iron. Scissors should be sharp and dedicated to fabric cutting to ensure clean edges. A measuring tape is necessary for accurately cutting the fabric to the desired length and width.
Pins are useful for holding the fabric in place during the sewing process. For those who prefer a quicker method, a sewing machine is ideal. However, hand-sewing is also an option and can be a relaxing and meditative process. An iron is essential for pressing the fabric, which helps create crisp folds and a polished finish.
Additional Embellishments
To add a personalized touch to the hair ribbons, consider incorporating embellishments such as beads, sequins, lace, or embroidery floss. These decorative elements can elevate the design and make the ribbon truly unique. When selecting embellishments, ensure they are securely attached to prevent them from falling off during use.
Preparing the Workspace
Before starting the project, it is important to set up a clean and organized workspace. A flat surface, such as a table or desk, is ideal for cutting and sewing. Ensure that all materials and tools are within reach to avoid interruptions during the crafting process. Having a well-prepared workspace will contribute to a more enjoyable and efficient experience.
By gathering the right materials and tools, crafters can set themselves up for success in creating beautiful and unique hair ribbons. The next part of the guide will delve into the process of cutting and preparing the fabric, laying the groundwork for the actual creation of the ribbons.
Cutting and Preparing the Fabric
With all the necessary materials and tools at hand, the next step in creating DIY hair ribbons is cutting and preparing the fabric. This stage is crucial, as it sets the foundation for the final product. Properly measured and cut fabric ensures that the ribbon will have a polished and professional appearance. This section will provide a step-by-step guide to cutting and preparing the fabric, along with tips for achieving the best results.
Measuring the Fabric
The first step in preparing the fabric is measuring it to the desired dimensions. The length and width of the ribbon will depend on personal preference and the intended use. For a standard hair ribbon, a length of 20 to 30 inches and a width of 1 to 2 inches is recommended. However, these measurements can be adjusted to create thicker or thinner ribbons, depending on the desired look.
Using a measuring tape, carefully measure the fabric and mark the dimensions with a fabric pen or chalk. It is important to be precise during this step, as uneven measurements can result in a lopsided or misshapen ribbon. For those who prefer a more uniform look, using a ruler or straight edge can help ensure straight lines.
Cutting the Fabric
Once the fabric has been measured and marked, the next step is cutting it. Sharp fabric scissors are essential for achieving clean and precise cuts. It is important to cut along the marked lines as accurately as possible. For those working with patterned fabric, paying attention to the pattern alignment is crucial to ensure a cohesive design.
After cutting the fabric, it is recommended to double-check the measurements to ensure accuracy. Any discrepancies can be corrected at this stage before moving on to the next step. Taking the time to cut the fabric properly will result in a more polished and professional-looking ribbon.
Pressing the Fabric
After cutting the fabric, the next step is pressing it with an iron. Pressing the fabric helps to remove any wrinkles and creates crisp edges, which are essential for a neat and tidy appearance. Set the iron to the appropriate temperature for the chosen fabric, and carefully press along the edges and folds.
For those who want to add a decorative touch, pressing the fabric can also help create pleats or folds. This technique adds texture and dimension to the ribbon, making it more visually interesting. Experimenting with different folding techniques can result in unique and creative designs.
Preparing the Ends
The final step in preparing the fabric is finishing the ends. Raw edges can fray over time, so it is important to secure them to ensure the longevity of the ribbon. There are several methods for finishing the ends, including folding and sewing, using fabric glue, or applying a heat sealant.
For a more polished look, folding the edges and sewing them is recommended. This method creates a clean and durable finish. Alternatively, fabric glue or heat sealant can be used for a quicker and easier option. Whichever method is chosen, ensuring that the ends are securely finished will prevent fraying and extend the life of the ribbon.
By carefully cutting and preparing the fabric, crafters can create a solid foundation for their DIY hair ribbons. The next part of the guide will focus on the sewing and assembly process, bringing the ribbon to life.
Sewing and Assembling the Ribbon
With the fabric cut and prepared, the next step in creating DIY hair ribbons is sewing and assembling the ribbon. This stage involves bringing the pieces of fabric together to form the final product. Whether using a sewing machine or hand-sewing, this process requires attention to detail and patience. This section will provide a comprehensive guide to sewing and assembling the ribbon, along with tips for achieving a professional finish.
Folding and Pinning the Fabric
The first step in assembling the ribbon is folding the fabric to create the desired shape. For a classic hair ribbon, the fabric is typically folded in half lengthwise, with the right sides facing each other. This creates a long, narrow strip that will form the body of the ribbon.
Once the fabric is folded, it is important to secure it with pins. Pinning the fabric helps to keep it in place during the sewing process and ensures that the edges align properly. It is recommended to place pins perpendicular to the edge of the fabric, as this makes them easier to remove while sewing.
Sewing the Ribbon
With the fabric pinned, the next step is sewing it together. Using a sewing machine is the quickest and most efficient method, but hand-sewing is also an option for those who prefer a more hands-on approach. When using a sewing machine, it is important to select the appropriate stitch length and tension for the chosen fabric.
Begin sewing along the long edge of the fabric, leaving a small seam allowance. It is important to sew slowly and steadily to ensure straight and even stitches. For added durability, backstitching at the beginning and end of the seam is recommended.
Once the long edge is sewn, the next step is sewing the short ends. This creates a fully enclosed tube of fabric. After sewing, carefully trim any excess fabric and clip the corners to reduce bulk. This step helps to create a cleaner and more polished finish.
Turning the Ribbon Right Side Out
After sewing, the next step is turning the ribbon right side out. This can be done using a turning tool, such as a chopstick or knitting needle. Gently push the tool through the sewn tube, working the fabric until it is fully turned.
Once the ribbon is right side out, it is important to press it with an iron. This helps to smooth out any wrinkles and creates crisp edges. Pay special attention to the corners, ensuring they are fully turned and sharp.
Adding the Center Knot
For a classic hair ribbon, the final step in assembly is adding the center knot. This is the small piece of fabric that wraps around the center of the ribbon, creating the iconic bow shape. To create the center knot, cut a small piece of fabric and fold it in half lengthwise, right sides together.
Sew along the long edge, leaving the short ends open. Turn the fabric right side out and press it with an iron. Then, wrap the center knot around the middle of the ribbon and secure it with a few hand stitches. This step completes the assembly process and gives the ribbon its finished look.
By carefully sewing and assembling the ribbon, crafters can create a beautiful and functional hair accessory. The next part of the guide will focus on decorating and personalizing the ribbon, adding the final touches to make it truly unique.
Decorating and Personalizing the Ribbon
The final step in creating DIY hair ribbons is decorating and personalizing them. This stage allows crafters to add their own unique touch to the ribbon, making it a true reflection of personal style. From simple embellishments to intricate designs, the possibilities are endless. This section will provide a detailed guide to decorating and personalizing hair ribbons, along with tips for achieving a professional and polished finish.
Choosing Embellishments
The first step in decorating the ribbon is choosing the right embellishments. There are countless options available, including beads, sequins, lace, embroidery floss, and fabric paint. The choice of embellishments will depend on personal preference and the intended use of the ribbon.
For a subtle and elegant look, consider using lace or embroidery floss. These materials can be used to create delicate patterns or add a touch of texture to the ribbon. For a more bold and eye-catching design, beads and sequins are an excellent choice. These embellishments can be arranged in various patterns to create a unique and personalized design.
Attaching Embellishments
Once the embellishments have been chosen, the next step is attaching them to the ribbon. The method of attachment will depend on the type of embellishment and the desired look. For beads and sequins, using a needle and thread is the most secure method. Carefully sew each bead or sequin onto the ribbon, ensuring they are evenly spaced and securely attached.
For lace or fabric appliqués, fabric glue can be used for a quicker and easier option. Apply a small amount of glue to the back of the embellishment and press it onto the ribbon. Allow the glue to dry completely before handling the ribbon.
Adding Personal Touches
In addition to embellishments, there are other ways to personalize the ribbon. Consider adding initials, names, or small symbols using fabric paint or embroidery. These personal touches can make the ribbon even more special and meaningful.
For those who enjoy embroidery, adding small designs or patterns can create a unique and intricate look. Use embroidery floss to stitch designs directly onto the ribbon. This technique requires patience and precision but results in a truly one-of-a-kind accessory.
Finishing Touches
The final step in decorating the ribbon is adding any finishing touches. This may include trimming any loose threads, pressing the ribbon with an iron, or adding a protective coating to the embellishments. Taking the time to complete these final steps ensures that the ribbon is polished and ready to wear.
By decorating and personalizing the ribbon, crafters can create a unique and stylish accessory that reflects their personal style. The final part of the guide will provide tips on styling and maintaining the ribbon, ensuring it remains a cherished accessory for years to come.
Conclusion: Styling and Maintaining Your DIY Hair Ribbons
Creating DIY hair ribbons is a rewarding and enjoyable process that allows for endless creativity and self-expression. From selecting materials to adding personalized embellishments, each step of the process offers an opportunity to create something truly unique. By following this comprehensive guide, crafters can create beautiful and functional hair accessories that reflect their personal style.
Once the ribbons are complete, the next step is styling them. Hair ribbons can be worn in a variety of ways, from simple ponytail ties to elaborate bow designs. Experimenting with different hairstyles and ribbon placements can create a range of looks, from casual and playful to elegant and sophisticated.
In addition to styling, it is important to properly maintain the ribbons to ensure their longevity. Hand-washing the ribbons in cold water and allowing them to air dry is recommended to prevent damage to the fabric and embellishments. Storing the ribbons in a cool, dry place will also help to preserve their quality.
By taking the time to create, style, and maintain DIY hair ribbons, crafters can enjoy a unique and personalized accessory that adds a touch of creativity to any outfit. Whether for personal use or as a thoughtful gift, handmade hair ribbons are a testament to the joy of crafting and the beauty of self-expression. So, embrace your creativity and start crafting your own unique hair ribbons today!


