: A Flavorful Vietnamese Delight")
: A Wholesome Vietnamese Delight")
: A Nutritious and Delicious Vietnamese Delight")


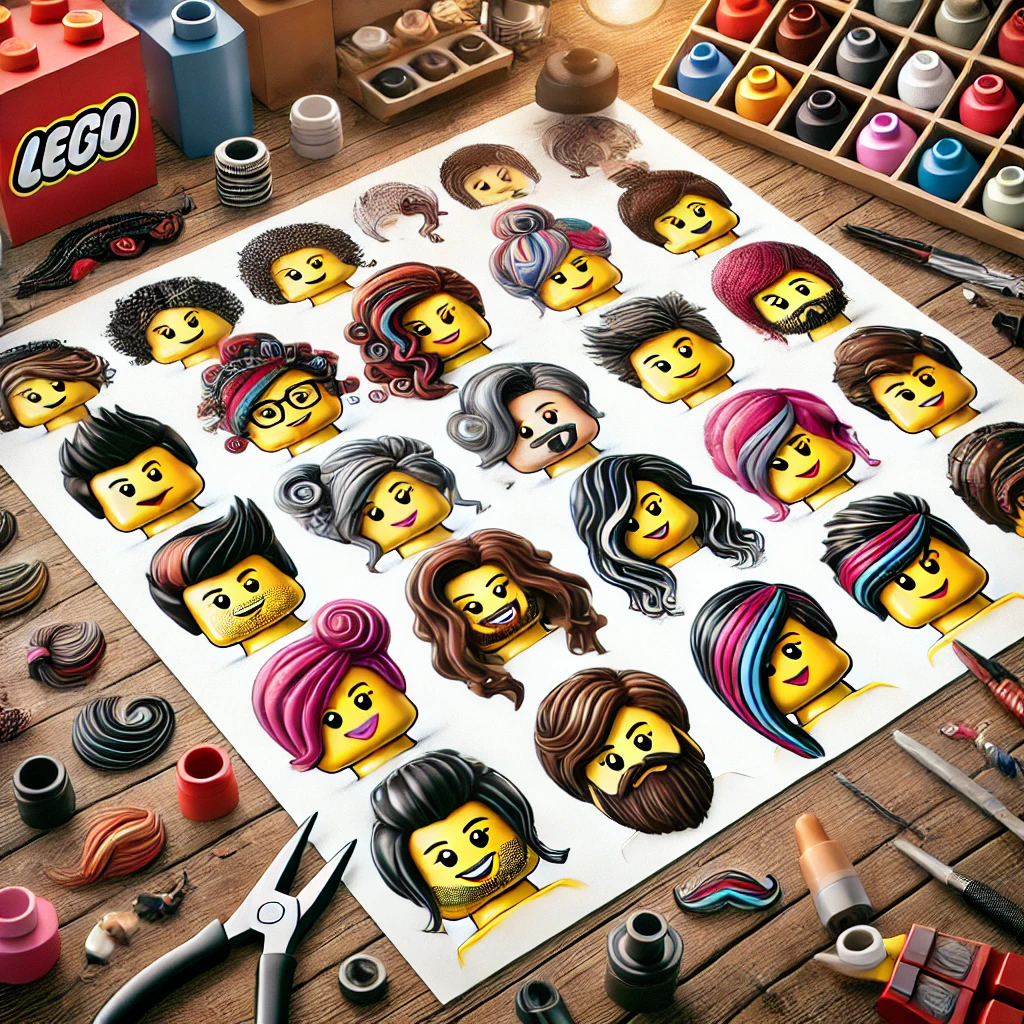
LEGO Hair Customization
Understanding the Basics of LEGO Minifigures
LEGO minifigures have been a staple of the LEGO universe since their introduction in 1978. These small, articulated figures have captured the imaginations of children and adults alike, offering endless possibilities for storytelling and creativity. One of the most distinctive features of a LEGO minifigure is its hairpiece. The hairpiece not only defines the character’s appearance but also adds a layer of personality and uniqueness. Over the years, LEGO has produced a wide variety of hairpieces, ranging from simple styles to intricate designs. However, for those looking to create truly unique minifigures, customization is key.
Customizing LEGO hairpieces allows builders to go beyond the standard offerings and create minifigures that are one-of-a-kind. Whether it’s for a custom character in a LEGO stop-motion film, a unique addition to a LEGO city, or simply a personal project, mastering the art of LEGO hair customization opens up a world of creative possibilities. This article will explore the various techniques and tips for customizing LEGO hair, from simple modifications to advanced sculpting and painting.
The Importance of Hair in Character Design
In the world of LEGO, as in real life, hair plays a significant role in defining a character’s identity. Hair can convey age, gender, personality, and even cultural background. For example, a minifigure with a sleek, modern hairstyle might be perceived as a contemporary character, while one with a wild, untamed mane could be seen as a rugged adventurer or a mythical creature. The color, shape, and texture of the hairpiece all contribute to the overall impression of the minifigure.
Customizing hair allows builders to tailor these elements to their specific needs. Perhaps a builder wants to create a minifigure that represents a historical figure, a character from a favorite book, or even themselves. By customizing the hair, they can achieve a level of detail and accuracy that standard LEGO hairpieces might not provide. Additionally, custom hair can be used to differentiate between characters in a large LEGO collection, making it easier to identify and connect with each figure.
Tools and Materials for LEGO Hair Customization
Before diving into the world of LEGO hair customization, it’s important to gather the necessary tools and materials. The specific tools required will depend on the level of customization desired, but some basic items are essential for most projects. These include a variety of LEGO hairpieces, which can be sourced from existing minifigures or purchased separately. It’s also helpful to have a selection of LEGO heads, as these will be needed to test and fit the customized hairpieces.
For more advanced customization, tools such as hobby knives, sandpaper, and sculpting tools may be necessary. These tools allow for precise cutting, shaping, and detailing of the hairpieces. Additionally, paints and brushes are essential for adding color and finishing touches to the customized hair. Acrylic paints are commonly used for LEGO customization due to their durability and ease of application. It’s also important to have a well-ventilated workspace and protective gear, such as gloves and masks, when working with paints and adhesives.
Planning Your Customization Project
As with any creative endeavor, planning is a crucial step in LEGO hair customization. Before making any cuts or applying any paint, it’s important to have a clear vision of the final product. This includes deciding on the character’s overall design, the style and color of the hair, and any additional accessories or details that will be incorporated into the minifigure.
One effective way to plan a customization project is to create a sketch or digital mockup of the desired minifigure. This allows the builder to experiment with different hair styles, colors, and accessories before committing to any physical changes. Additionally, it’s helpful to gather reference images or inspiration from other sources, such as movies, books, or real-life hairstyles. These references can provide valuable guidance and ensure that the final product is both unique and cohesive.
In conclusion, LEGO hair customization is a rewarding and creative process that allows builders to take their minifigures to the next level. By understanding the basics of LEGO minifigures, recognizing the importance of hair in character design, gathering the necessary tools and materials, and planning the customization project, builders can create unique and personalized minifigures that stand out in any LEGO collection. The following sections will delve deeper into the techniques and tips for mastering the art of LEGO hair customization, from simple modifications to advanced sculpting and painting.
Simple Modifications and Repainting Techniques
Getting Started with Simple Modifications
For those new to LEGO hair customization, starting with simple modifications is a great way to build confidence and develop skills. Simple modifications involve making small changes to existing LEGO hairpieces to create a new look. These changes can include cutting, sanding, or repainting the hairpiece to achieve a different style or color. The advantage of starting with simple modifications is that they require minimal tools and materials, making them accessible to builders of all skill levels.
One of the most straightforward modifications is to change the color of an existing hairpiece. This can be done by repainting the hairpiece with acrylic paints. Before painting, it’s important to clean the hairpiece thoroughly to remove any dust or oils that could affect the paint’s adhesion. Once the hairpiece is clean, a base coat of paint can be applied. This base coat should be a neutral color, such as white or gray, to ensure that the final color appears vibrant and true to the desired shade. After the base coat has dried, the hairpiece can be painted with the desired color. Multiple thin coats of paint are recommended to achieve a smooth, even finish.
Cutting and Reshaping Hairpieces
Another simple modification technique is cutting and reshaping existing hairpieces. This technique allows builders to create new hairstyles by altering the shape of the hairpiece. For example, a long, straight hairpiece could be cut into a shorter, more layered style, or a curly hairpiece could be trimmed to create a more controlled, wavy look. When cutting a hairpiece, it’s important to use a sharp hobby knife and to make small, precise cuts. This helps to avoid accidentally removing too much material and ensures that the final shape is clean and polished.
After cutting, the edges of the hairpiece may need to be sanded to remove any rough or jagged areas. Sanding can be done with fine-grit sandpaper or a sanding stick. It’s important to sand gently and evenly to avoid creating uneven surfaces or damaging the hairpiece. Once the hairpiece has been cut and sanded, it can be repainted if necessary to match the desired color or to add highlights and shadows for a more realistic appearance.
Combining Hairpieces for Unique Styles
For builders looking to create more complex hairstyles, combining multiple hairpieces is an effective technique. This involves taking two or more existing hairpieces and attaching them together to create a new, unique style. For example, a builder could combine a short, spiky hairpiece with a longer, flowing hairpiece to create a layered, textured look. Alternatively, a builder could attach a braided hairpiece to a ponytail hairpiece to create a more intricate updo.
When combining hairpieces, it’s important to ensure that they fit together securely and that the final shape is cohesive. This may require some trial and error, as well as additional cutting and sanding to achieve the desired fit. Once the hairpieces have been combined, they can be repainted to create a uniform color or to add additional details, such as highlights or lowlights.
Tips for Successful Repainting
Repainting is a key aspect of LEGO hair customization, and there are several tips and techniques that can help ensure a successful outcome. First, it’s important to choose the right type of paint. Acrylic paints are commonly used for LEGO customization due to their durability and ease of application. However, it’s important to use high-quality acrylic paints that are specifically designed for use on plastic surfaces. These paints are less likely to chip or peel over time and will adhere better to the hairpiece.
When applying paint, it’s important to use thin, even coats. Thick coats of paint can obscure the details of the hairpiece and may take longer to dry, increasing the risk of smudging or unevenness. Multiple thin coats are recommended to achieve a smooth, even finish. It’s also important to allow each coat of paint to dry completely before applying the next. This helps to prevent the paint from becoming tacky or uneven.
In conclusion, simple modifications and repainting techniques are a great way to get started with LEGO hair customization. By changing the color, cutting and reshaping, and combining hairpieces, builders can create unique and personalized hairstyles for their minifigures. With the right tools, materials, and techniques, even beginners can achieve impressive results. The next section will explore more advanced customization techniques, including sculpting and detailing, for those looking to take their LEGO hair customization to the next level.
Advanced Sculpting and Detailing Techniques
Advanced Customization
For builders who have mastered the basics of LEGO hair customization and are ready to take their skills to the next level, advanced sculpting and detailing techniques offer a new realm of creative possibilities. These techniques involve more intricate work, such as sculpting new hairpieces from scratch, adding fine details, and creating custom textures. While these methods require more time, patience, and skill, the results can be truly stunning and allow for a level of customization that goes far beyond what is possible with simple modifications.
Advanced customization often begins with the creation of a new hairpiece from a base material, such as polymer clay or epoxy putty. These materials are malleable and can be shaped into any desired form, allowing builders to create completely unique hairstyles that are not available in standard LEGO sets. Once the basic shape has been sculpted, additional details can be added, such as individual strands of hair, braids, or accessories like hairbands or clips. The final step is to paint and finish the hairpiece, ensuring that it matches the desired color and texture.
Sculpting New Hairpieces from Scratch
Sculpting a new hairpiece from scratch is a challenging but rewarding process. The first step is to choose the right material. Polymer clay, such as Sculpey or Fimo, is a popular choice for LEGO customization due to its ease of use and ability to hold fine details. Epoxy putty, such as Milliput or Green Stuff, is another option that offers greater durability and strength once cured. Both materials can be shaped by hand or with sculpting tools, and they can be baked or air-dried to harden.
When sculpting a new hairpiece, it’s important to start with a basic shape that matches the desired hairstyle. This can be done by rolling the material into a ball or log and then gradually shaping it into the desired form. For more complex hairstyles, it may be helpful to work in sections, sculpting one part of the hairpiece at a time and then attaching the sections together. For example, a builder might start by sculpting the main body of the hair and then add individual strands or curls separately.
Once the basic shape has been achieved, finer details can be added. This might include creating individual strands of hair, adding texture to mimic different hair types, or incorporating accessories like bows or headbands. Sculpting tools, such as needles, dental picks, or specialized clay tools, can be used to create these details. It’s important to work slowly and carefully, as small mistakes can be difficult to correct once the material has hardened.
Adding Fine Details and Textures
Adding fine details and textures is what truly brings a custom hairpiece to life. These details can include everything from individual strands of hair to intricate braids or waves. One effective technique for creating realistic hair texture is to use a fine-toothed comb or a needle tool to gently drag through the surface of the sculpted hairpiece. This creates the appearance of individual strands and adds depth and realism to the hairstyle.
For more complex textures, such as braids or curls, it may be necessary to sculpt these elements separately and then attach them to the main hairpiece. For example, a builder might sculpt a series of small curls or braids and then carefully attach them to the base of the hairpiece, blending the seams to create a seamless look. This process requires patience and precision, but the results can be incredibly lifelike.
Another way to add texture is through the use of paint. Once the hairpiece has been sculpted and hardened, it can be painted with acrylic paints to add highlights, shadows, and other details. Dry brushing is a particularly effective technique for adding texture, as it allows the paint to catch on the raised areas of the hairpiece, creating the appearance of depth and dimension. Additionally, washes or glazes can be used to add subtle shading and bring out the details of the sculpted hair.
Painting and Finishing the Hairpiece
Painting and finishing are the final steps in the advanced customization process, and they are crucial for achieving a professional-looking result. The first step is to apply a base coat of paint to the hairpiece. This base coat should be a neutral color, such as white or gray, to ensure that the final color appears vibrant and true to the desired shade. Once the base coat has dried, the hairpiece can be painted with the desired color. Multiple thin coats of paint are recommended to achieve a smooth, even finish.
After the main color has been applied, additional details can be added using fine brushes or other painting tools. This might include adding highlights, lowlights, or other subtle variations in color to create a more realistic appearance. For example, a builder might add lighter streaks to mimic the natural variation in hair color or darker shadows to create depth and dimension.
Once the painting is complete, the hairpiece should be sealed with a clear coat to protect the paint and ensure durability. A matte or satin finish is often the best choice for hairpieces, as it creates a more natural appearance. However, a glossy finish can be used for certain styles, such as wet or slicked-back hair, to create a shiny, reflective effect.
In conclusion, advanced sculpting and detailing techniques offer a new level of creativity and customization for LEGO hairpieces. By sculpting new hairpieces from scratch, adding fine details and textures, and carefully painting and finishing the final product, builders can create truly unique and lifelike hairstyles for their minifigures. While these techniques require more skill and patience, the results are well worth the effort. The final section of this article will explore tips and tricks for integrating custom hairpieces into LEGO builds and ensuring that they stand out in any collection.
Integrating Custom Hairpieces into LEGO Builds
Ensuring Compatibility with LEGO Minifigures
Once a custom hairpiece has been created, the next step is to ensure that it is compatible with LEGO minifigures. This involves checking the fit and stability of the hairpiece on a standard LEGO head. Custom hairpieces should fit snugly without being too tight or too loose, and they should not interfere with the movement of the minifigure’s head or other accessories, such as hats or helmets.
To test the fit, the custom hairpiece should be placed on a LEGO head and gently moved around to ensure that it stays in place. If the hairpiece is too loose, it may need to be adjusted by adding a small amount of material to the inside of the hairpiece or by using a small amount of adhesive to secure it in place. If the hairpiece is too tight, it may need to be sanded or trimmed to create a better fit.
It’s also important to consider the overall proportions of the custom hairpiece in relation to the minifigure’s body. A hairpiece that is too large or too small can look out of place and detract from the overall appearance of the minifigure. To ensure that the hairpiece is proportionate, it can be helpful to compare it to standard LEGO hairpieces and make adjustments as needed.
Incorporating Custom Hairpieces into LEGO Builds
Custom hairpieces can be used to enhance a wide variety of LEGO builds, from small dioramas to large-scale displays. When incorporating custom hairpieces into a build, it’s important to consider the overall theme and style of the build. For example, a custom hairpiece that features a futuristic or sci-fi design might be better suited to a space-themed build, while a more traditional or historical hairstyle might be more appropriate for a medieval or fantasy setting.
One effective way to integrate custom hairpieces into a build is to use them to create unique characters that stand out from the crowd. For example, a builder might create a custom hairpiece for a main character in a LEGO stop-motion film or for a special figure in a LEGO city. By giving these characters unique hairstyles, the builder can make them more memorable and visually distinct.
Another way to incorporate custom hairpieces is to use them to add variety and diversity to a LEGO collection. For example, a builder might create a series of custom hairpieces that represent different cultures, time periods, or fictional universes. This not only adds visual interest to the collection but also allows the builder to explore different styles and techniques.
Showcasing Custom Hairpieces in Displays
For builders who take pride in their custom hairpieces, showcasing them in a display can be a great way to highlight their work. This might involve creating a dedicated display case or shelf for custom minifigures, or incorporating the custom hairpieces into a larger LEGO diorama or scene. When creating a display, it’s important to consider the lighting and background, as these elements can greatly affect the visibility and impact of the custom hairpieces.
One effective way to showcase custom hairpieces is to use a rotating display stand or turntable. This allows viewers to see the hairpiece from all angles and appreciate the details and craftsmanship that went into its creation. Additionally, using a neutral or contrasting background can help to make the hairpiece stand out and draw attention to its unique features.
Another way to showcase custom hairpieces is to photograph them and share the images online or in LEGO communities. High-quality photographs can capture the details and textures of the hairpiece and allow others to appreciate the builder’s work. When photographing custom hairpieces, it’s important to use good lighting and a clean, uncluttered background to ensure that the hairpiece is the focal point of the image.
Maintaining and Preserving Custom Hairpieces
Finally, it’s important to consider the long-term maintenance and preservation of custom hairpieces. Over time, custom hairpieces may become dusty, dirty, or damaged, especially if they are frequently handled or displayed. To keep custom hairpieces looking their best, it’s important to clean them regularly and store them properly when not in use.
Cleaning custom hairpieces can be done with a soft brush or cloth to remove dust and dirt. For more stubborn stains or marks, a mild soap and water solution can be used, but it’s important to avoid soaking the hairpiece or using harsh chemicals that could damage the paint or material. After cleaning, the hairpiece should be allowed to dry completely before being stored or displayed.
When storing custom hairpieces, it’s important to keep them in a cool, dry place away from direct sunlight or extreme temperatures. This helps to prevent the material from becoming brittle or discolored over time. Additionally, custom hairpieces should be stored in a way that prevents them from being crushed or damaged, such as in a padded